
These two special effect icings look best on a square single tier cake, where their subtle detailing can be seen without distractions. They also look good if you cut them into circles and lay them over cupcakes that have had their tops levelled.
For wood effect icing you need:
Ingredients
- 450g (1lb) white rolled fondant icing – you make this or buy it ready made.
- Brown food colouring gel
- 2 tablespoons vodka
- Icing sugar
Method
Begin by sifting a little icing sugar over your worksurface – this stops the fondant sticking and you may need to repeat the process several times as you work.
Cut the fondant in two and squirt a tiny amount of brown food gel onto one piece before kneading it well in. A food processor with a bread paddle does this without adding warmth to the fondant in the way that hand kneading does. Keep adding a small amount of colour at a time until you end up with something the shade of a brown paper envelope.
Roll each fondant piece into a long thin string, about 2cm in diameter.
Now twist the brown fondant around the white one – you should find that the brown one is more flexible. Allow the white to show through the twist as this creates the pattern of the wood.
If necessary, double the strings up so that you can roll them out. As you roll, ensure the fondant blends and melds together without any holes. Keep rolling until it is slightly bigger than your cake and lay it over the cake in question.
Using a skewer, toothpick or other implement, make a wood pattern. Where possible have a piece of suitable wood, or a photograph of your chosen wood, beside you as you work. You may choose a regular parquet design which can be made by using a small rectangular box as a pattern for marking the blocks, or a design with knots. Only score the top surface of the fondant lightly.
Now mix the vodka with a tiny amount of the brown gel colour and use a wide brush to lay a very thin coat over the entire fondant surface. After half an hour, add more gel to the vodka and use this with a fine brush to pick out detail in the knots or borders of the wood blocks.
Marble Effect Icing
For marble effect icing you need:
- 450g (1lb) white rolled fondant icing
- Red, brown and black food colouring gel
- 2 tablespoons vodka
- Icing sugar
- White edible glitter (optional)
Method
Begin by sifting a little icing sugar over your worksurface – this stops the fondant sticking and you may need to repeat the process several times as you work.
Cut the fondant in two. Set half aside and then divide the other half in two again. Add a small amount of red food colouring to one piece and brown to the other before kneading in as above. Keep adding a small amount of colour at a time until you end up with your chosen colours: ideally you should aim for a light to mid pink and a very light beige.
Pinch a tiny piece off the white fondant before rolling each fondant piece out. The small piece should be about the size of a walnut. The white string of fondant should be around 2cm while the other two should be a single cm in diameter. Twist as above
If necessary, double the strings up so that you can roll them out. As you roll, ensure the fondant blends and melds together without any holes. Roll until it is around half the size you require.
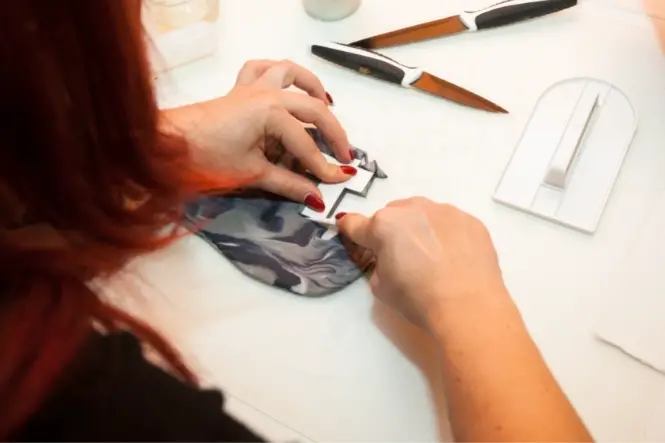
Take a toothpick or other implement, and make some long thin zig-zag grooves all over the fondant.
Mix black food colouring gel into the white fragment until it is charcoal grey. Roll out tiny pieces of this grey fondant, which will be very soft, and push them gently into the grooves. Continue rolling. The grey fondant will spread through the rest, making a pattern like marble
Now mix the vodka with a tiny amount of the red gel and use a wide brush to lay a very thin coat over the entire fondant surface to give it a gentle rose colour. At this point you may wish to add a little edible glitter with a fine dry brush to add to the stone-like effect.
